
Website staging allows you to test changes to your site in a safe environment before publishing them live. With Softaculous, you can easily create a staging copy of your application (such as WordPress) and push updates once you’re ready.
Why Use Staging?
-
Prevents errors from breaking your live site.
-
Lets you test new themes, plugins, or code safely.
-
Provides a controlled environment for development.
-
Reduces downtime and risk during updates.
Setting Up the Staging Environment
Before creating a staging site, you must set up a location for it:
-
Create a Subdomain
-
Example:
staging.example.com -
Use cPanel to add a subdomain dedicated to staging.
-
-
Create an Addon Domain
-
Register a new domain and use it for staging.
-
Requires additional domain registration.
-
⚠️ Note: Some applications (like Magento) may not support staging due to licensing restrictions.
Backing Up Your Site
-
Always back up your site before staging.
-
Softaculous offers automatic backups, but it’s best to keep manual or off‑site backups as well.
-
Backups ensure you can restore your site if something goes wrong.
Creating a Staging Copy
-
Log in to cPanel.
-
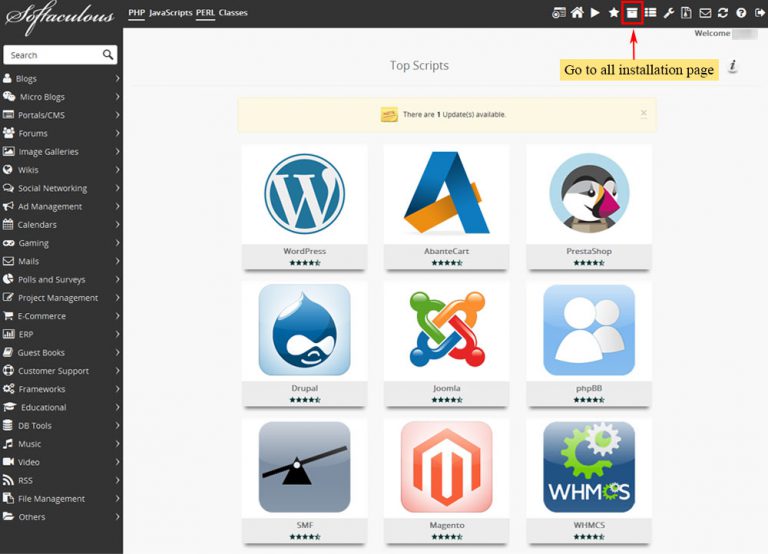
Go to Softaculous Apps Installer.
-
Click All Installations.
-
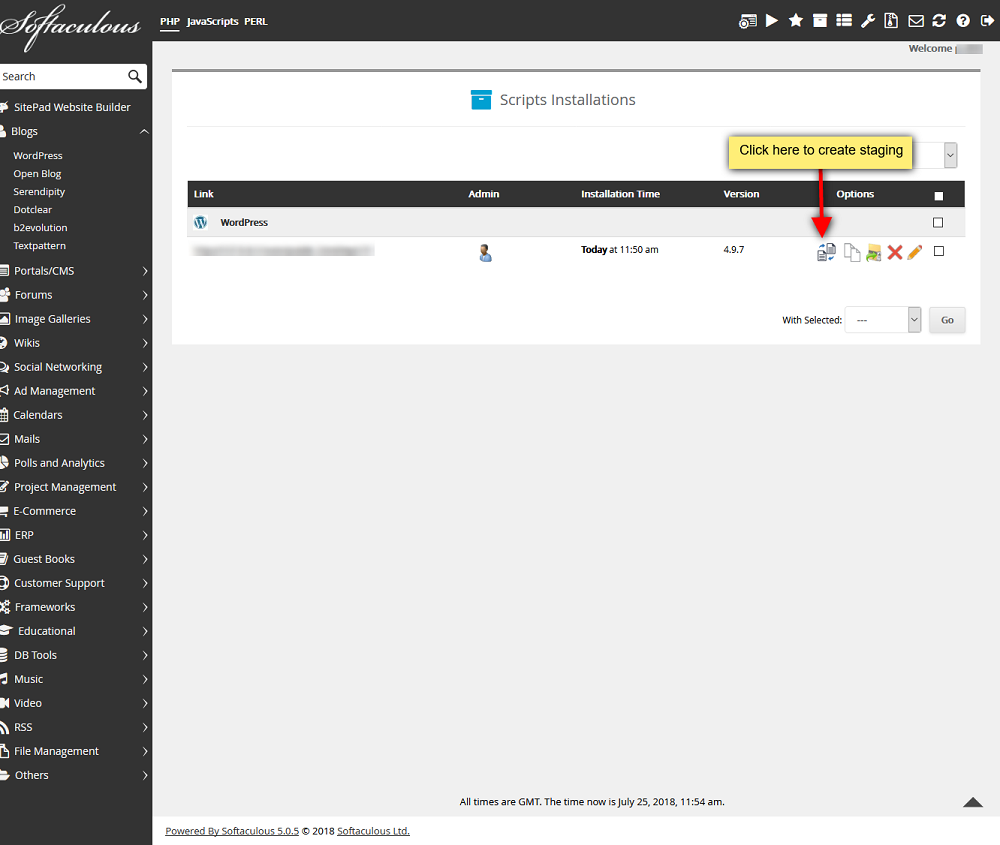
Locate the application (e.g., WordPress) and click the Create Staging icon.
-
Fill in details:
-
Choose Protocol →
http://orhttps:// -
Choose Domain → Select your staging subdomain/addon domain
-
In Directory → e.g.,
staging -
Database Name → Provide a unique database name
-
-
Click Create Staging.
-
Wait for the staging copy to be created.
You can now log in to the staging site using the same credentials as your live site.
Pushing Staging to Live
Once you’re satisfied with changes:
-
Log in to cPanel.
-
Go to Softaculous Apps Installer → All Installations.
-
Click the Push to Live icon next to your staging site.
-
Choose:
-
Default Push → Replaces all files and database with staging copy.
-
Custom Push → Select specific files or database changes to push.
-
-
Click Push to Live.
-
Review your live site to confirm everything works correctly.


