
WebHost Manager (WHM) and WHMCS (Web Host Manager Complete Solution) integrate seamlessly to automate hosting account creation, billing, and customer management. Once connected, WHMCS can provision accounts directly in WHM without manual intervention.
Why Connect WHM to WHMCS?
-
Automate hosting account creation and suspension.
-
Sync billing and account management.
-
Provide customers with a self‑service portal.
-
Reduce administrative workload and errors.
Steps to Connect WHM to WHMCS
1. Log in to WHMCS
-
Access your WHMCS admin dashboard.
2. Open System Settings
-
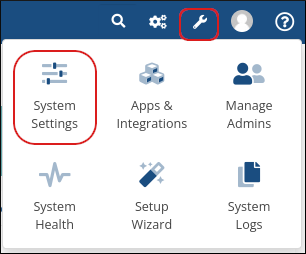
Click the wrench (spanner) icon in the top menu.
-
Select System Settings.
3. Add a New Server
-
In the search box, type Server.
-
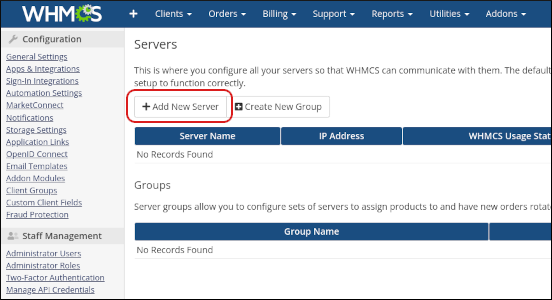
Click Servers.
-
On the Servers page, click Add New Server.
4. Configure Server Details
-
Name → Enter a descriptive name (e.g., Main WHM Server).
-
Hostname or IP Address → Enter your WHM server’s hostname or IP.
-
Username → Enter your WHM root or reseller username.
-
Password → Enter the WHM password.
-
API Token (Optional) → Instead of a password, you can generate an API token in WHM and paste it here.
If using an API token, leave the password field blank.
5. Select Module
-
In the Module dropdown, select cPanel.
6. Test Connection
-
Click Test Connection.
-
WHMCS will verify the credentials and connection.
7. Save Changes
-
Once verified, click Save Changes.
-
WHM is now connected to WHMCS.
Notes
|


